shipit
shipitContext aware publishing.
- call from base branch -> latest version released (LATEST)
- call from prerelease branch -> prerelease version released (NEXT)
- call from PR in CI -> canary version released (CANARY)
- call locally when not on base/prerelease branch -> canary version released (CANARY)
Options
| Flag | Type | Description |
|---|---|---|
--name | String | Git name to commit with. Defaults to package definition for the platform |
--email | String | Git email to commit with. Defaults to package definition for the platform |
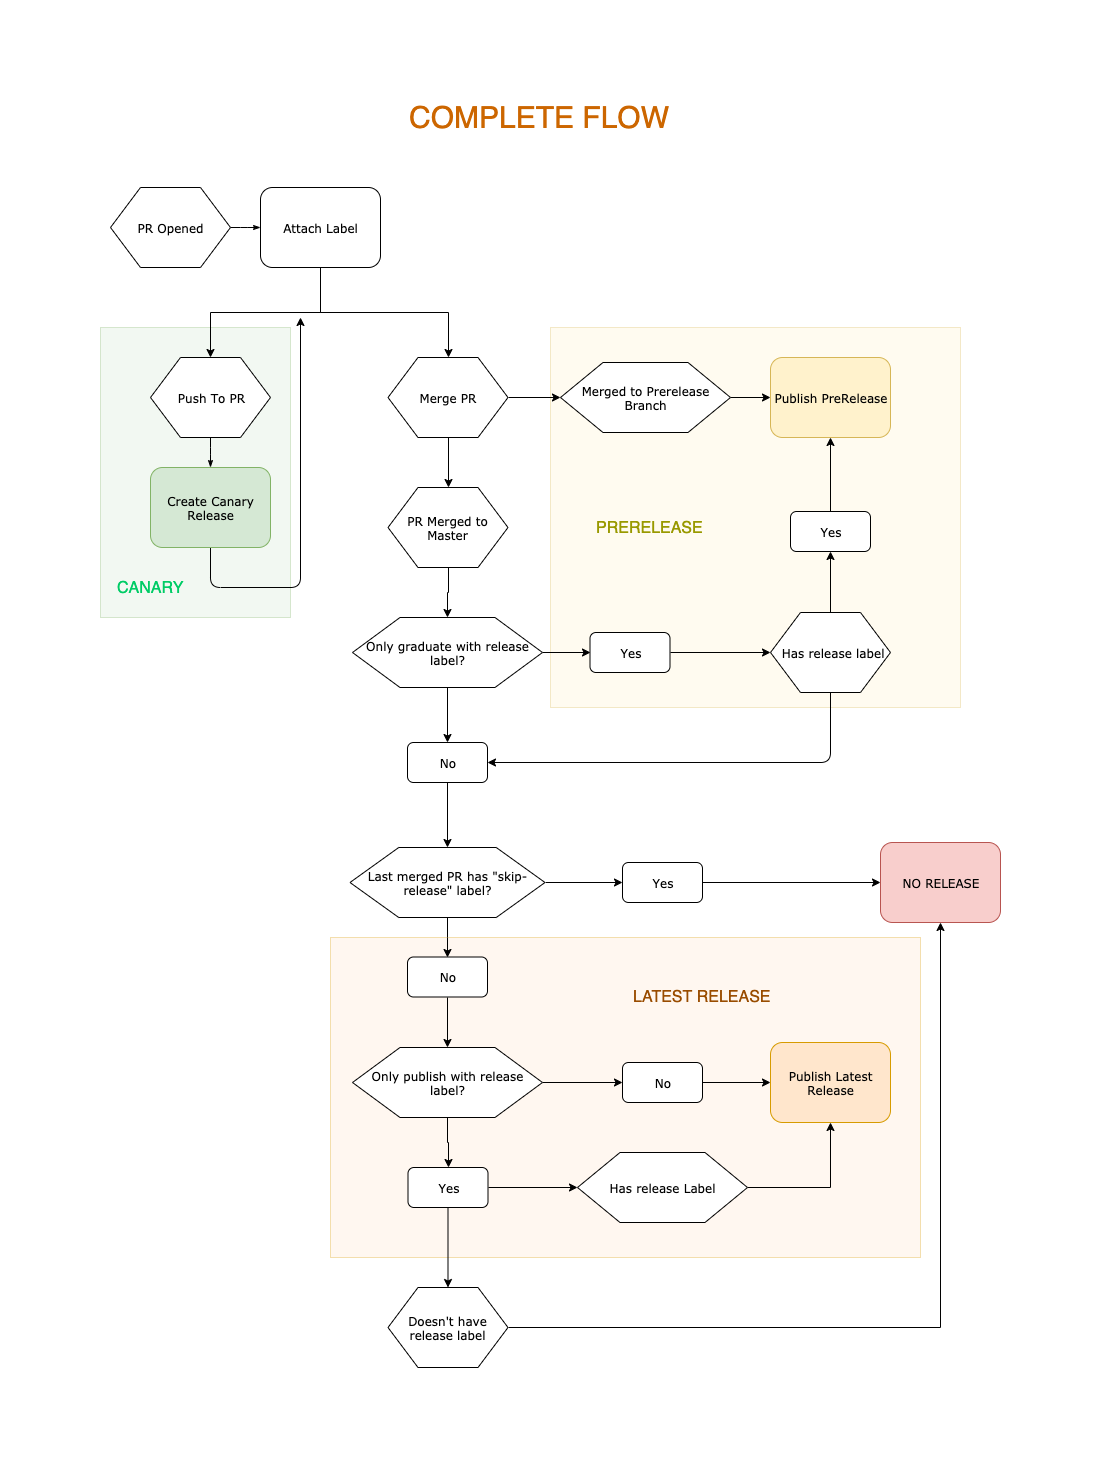
--only-publish-with-release-label | Boolean | Only bump version if 'release' label is on pull request |
--base-branch | String | Branch to treat as the base branch |
--dry-run, -d | Boolean | Report what command will do but do not actually do anything |
--no-version-prefix | Boolean | Use the version as the tag without the 'v' prefix. WARNING: some plugins might need extra config to use this option (ex: npm) |
--prerelease | Boolean | Publish a prerelease on GitHub. |
--title | String | Override the title used in the addition to the CHANGELOG.md. |
--message, -m | String | Message to commit the changelog with. Defaults to 'Update CHANGELOG.md [skip ci]' |
--quiet, -q | Boolean | Print only the result of the command |
--no-changelog | Boolean | Skip creating the changelog |
--only-graduate-with-release-label | Boolean | Make auto publish prerelease versions when merging to baseBranch. Only PRs merged with "release" label will generate a "latest" release. Only use this flag if you do not want to maintain a prerelease branch, and instead only want to use baseBranch. |
Examples
auto shipitauto shipit
Configurable Options
You can configure some of the options for the shipit command in the .autorc.
prereleasemessageno-changelogonly-graduate-with-release-label
Example .autorc:
{ "shipit": { "prerelease": true, "message": "string", "noChangelog": true, "onlyGraduateWithReleaseLabel": true } }{ "shipit": { "prerelease": true, "message": "string", "noChangelog": true, "onlyGraduateWithReleaseLabel": true } }
Release Pipeline
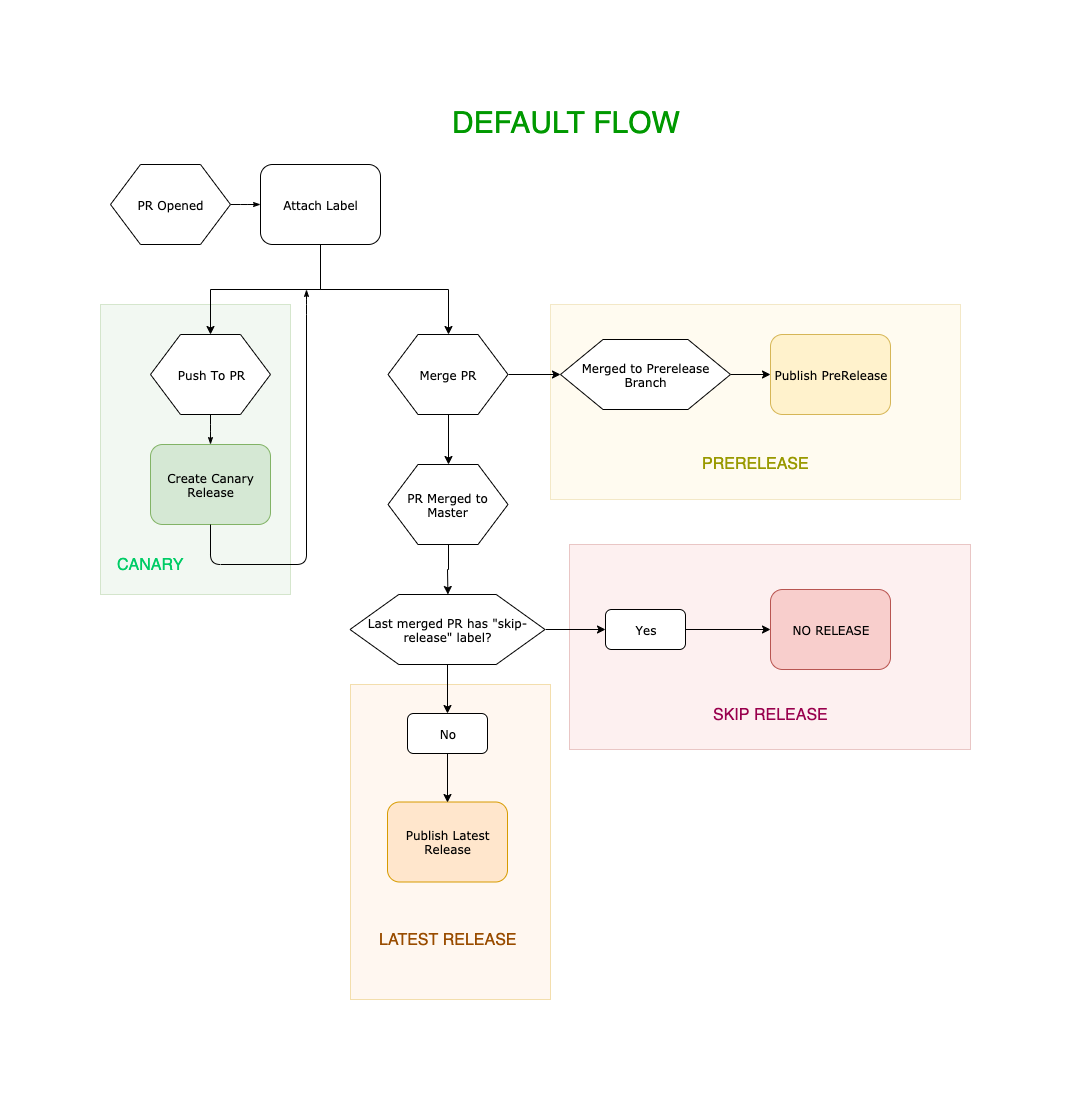
Below is the basics steps auto takes when releasing your code through the shipit command.

You can customize how this pipeline operates with various flags. The following shows how those flags can effect the workflow.

Managing Old Major Versions
This command also has the ability to help you manage old major versions too!
This feature is off by default, to enable set versionBranches to true in your .autorc.
With this feature enabled auto shipit will:
- Create a version branch when a
majorhappens (prefixed withversion-) - When ran from a
versionBranchmake a release to that version
Now that you have a branch for an old major release, it is super easy to release patches to it!
People can make PRs to the the version- branch and once merged create a new release of that version.
Customize Branch Prefix
You can customize what the branch names will be by setting versionBranches to a string.
{ "versionBranches": "Major-" }{ "versionBranches": "Major-" }
Prereleases
If you are interested in pre-releases (ex: alpha, beta, next) auto has the ability to publish pre-releases in various ways.
Read more about preparing you project for pre-releases here.
Strategies
"next" Branch (default)
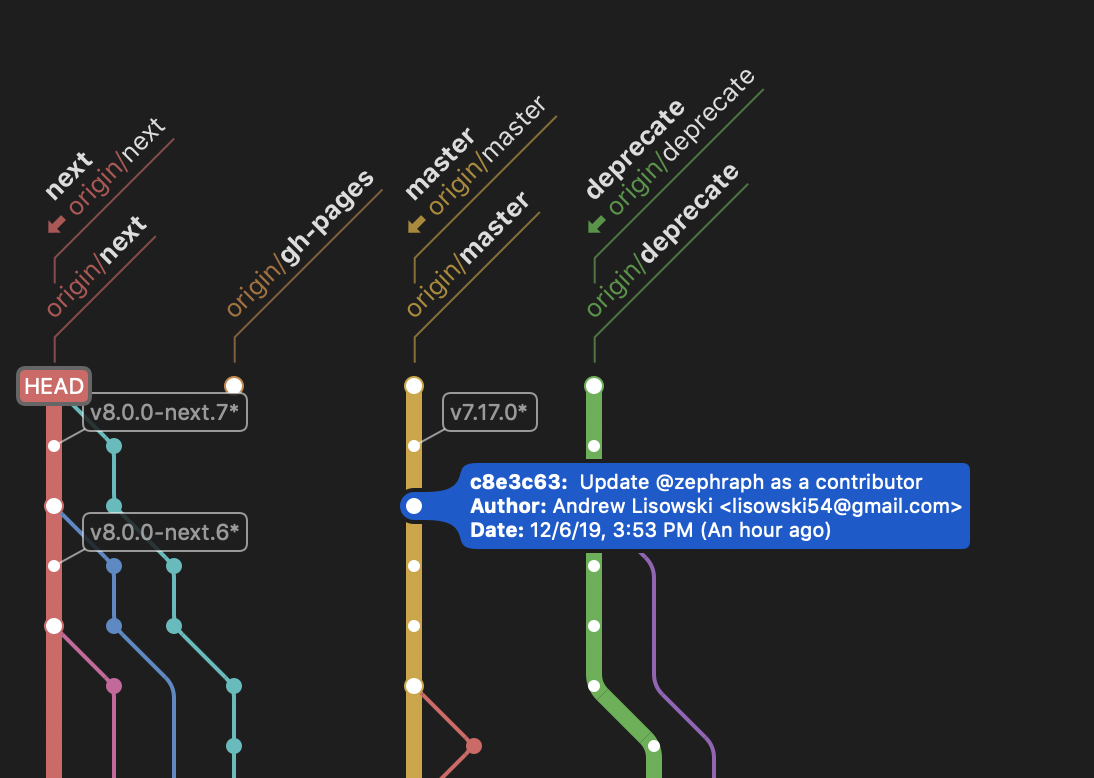
The suggested way to create pre-releases is by managing 2 branches for your repo: baseBranch and next.
baseBranch contains the latest stable version of the code, and next contains future updates.
You can change what branches auto treats as pre-release branches in your .autorc.

To update the latest stable version simply merge your pre-release branch into your baseBranch.
Without "next" Branch (--only-graduate-with-release-label)
If you use the --only-graduate-with-release-label flag, you do not have to manage 2 branches.
Instead you only have a baseBranch and do all work and pull requests there.
auto will only publish pre-releases when PRs are merged.
To update the latest stable version add the released label to the PR.
While this setup may be simpler, it restricts you from updating latest while development is happening for the pre-release. With 2 branches you can easily merge update to the latest release, with 1 this is not possible.
Multiple "next" Branches
Sometimes you might want to have more rigorous release lines. This can help test out bugs on a smaller set of users.
One setup you could use to accomplish this is by creating 3 prereleaseBranches
{ "prereleaseBranches": ["alpha", "beta", "rc"] }{ "prereleaseBranches": ["alpha", "beta", "rc"] }
You could then set you default to alpha and auto would publish updates merged to that branch under the alpha release tag.
When you are ready for the update to get used by more users just merge alpha into beta.
This will publish a beta release to the matching release tag.
Repeat this same process when graduating to rc or latest.
Feature Pre-releases
Sometimes you are working on a large feature that requires a lot of work.
Instead of making a giant PR with a bunch of updates, you can create a prereleaseBranch to track the work.
{ "prereleaseBranches": ["next", "my-cool-feature"] }{ "prereleaseBranches": ["next", "my-cool-feature"] }
Now instead of just getting a canary version when merging into the my-cool-feature branch, a prerelease version is published under the my-cool-feature release tag!
This enables other to consume just this line of work and enables your work to be more flexible.